10+ Bullet Journal Examples to Download
In journal entry writing, the length and the topic of what you are going to write are solely under your discretion. Aside from that, it is a very effective method where you will be able to express whatever thoughts that are running inside your head and additionally, your freedom to write whatever you want to write are limitless. You can basically write anything on your journal entry aside from the usual recording of what happened in your day, and this may include your to-do lists, hopes, dreams, secrets, failures, love, loss, and anything and everything your roller coaster of life could offer.
With all of the things you want to include in your journal, you might get to a point wherein writing every single one of your thoughts is already a taxing thing to do. And if there is one thing that could make journal writing easier but still as effective as a typical journal entry, you might probably adapt to it.
Lucky you because there really is an easier way to write your journal entry and that is through bullet journaling.
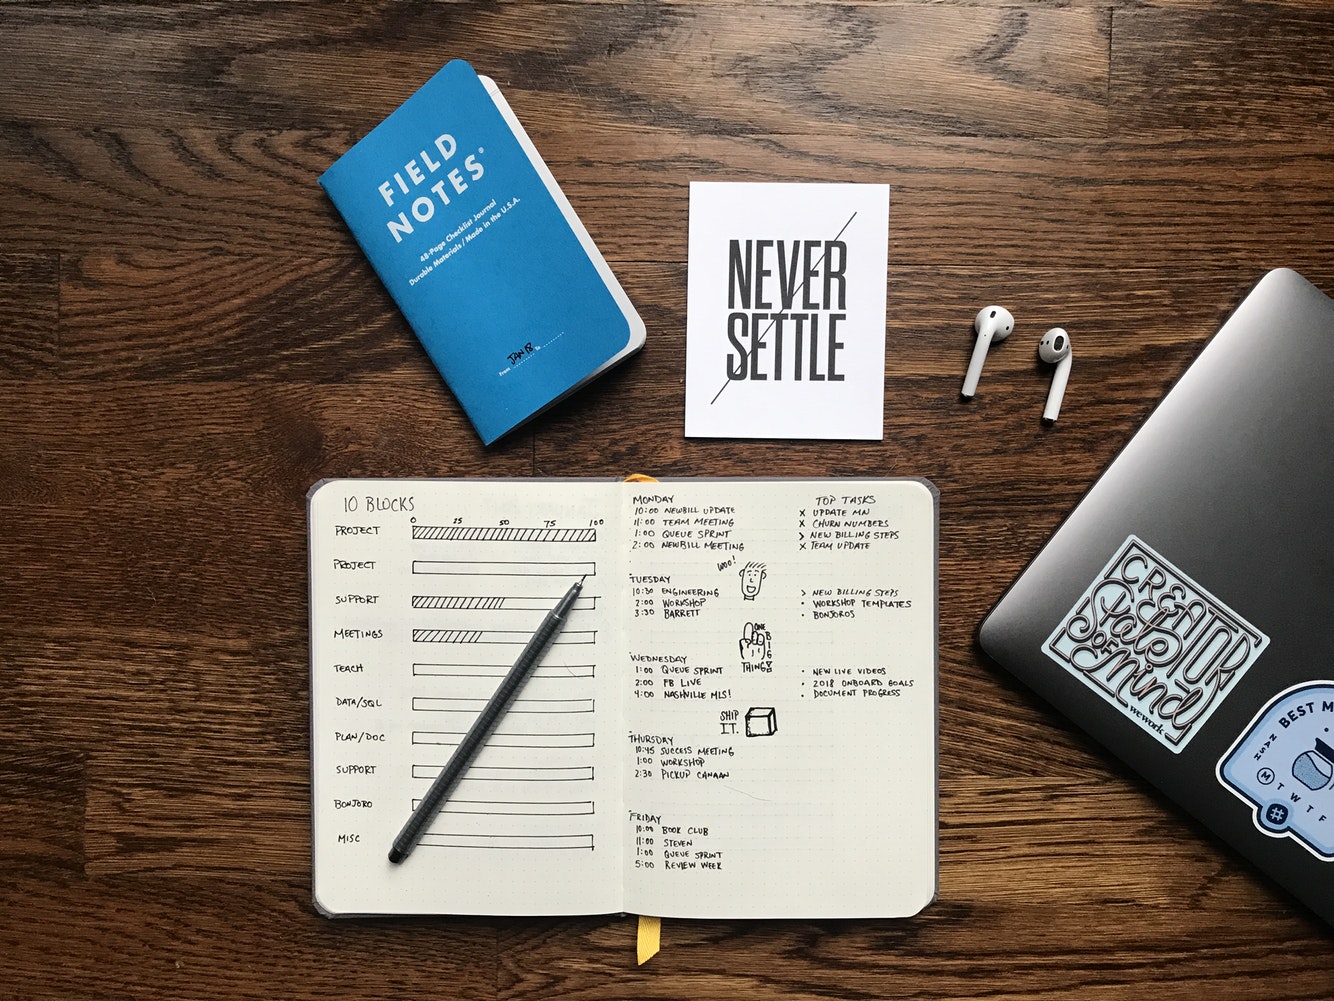
One of the great things that journal entries could do is that it offers you a clean and blank canvas every time you would decide to log or record the events that happened in your day and the moments you want to have a concrete reminder. With all the things that are kept in our heads, we can find relief once we would get it written down on paper. You will no longer feel overwhelmed with all the thoughts that are filling up your head to the brim.
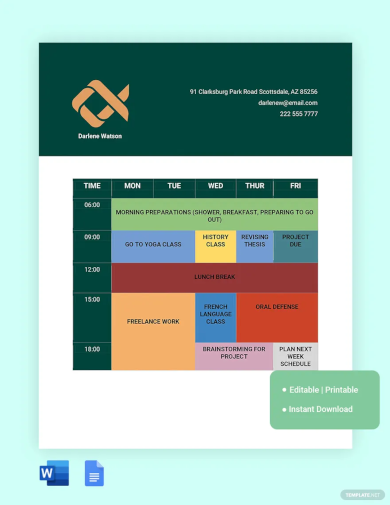
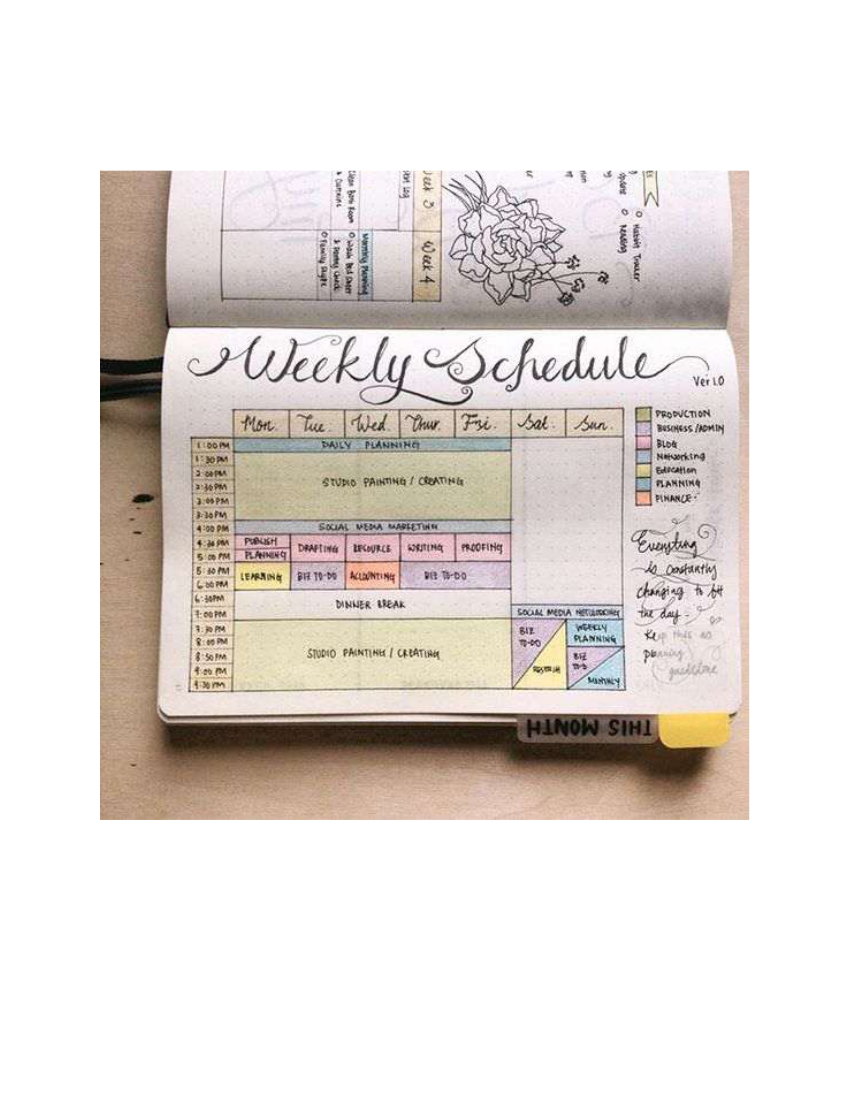
Bullet Journal Time Blocking Template
Bullet Journal Example for Professionals
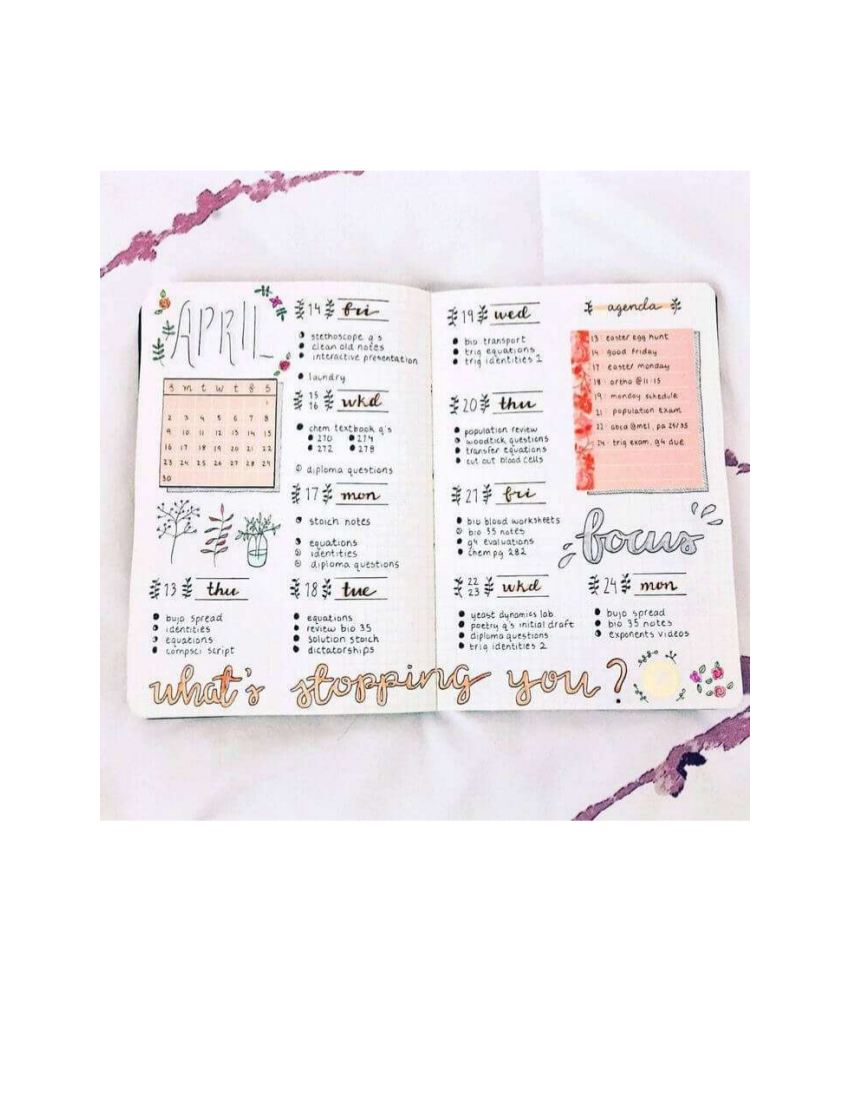
Bullet Journal Spread Example
Calligraphy Template Bullet Journal Example
Expense Tracker Bullet Journal Example
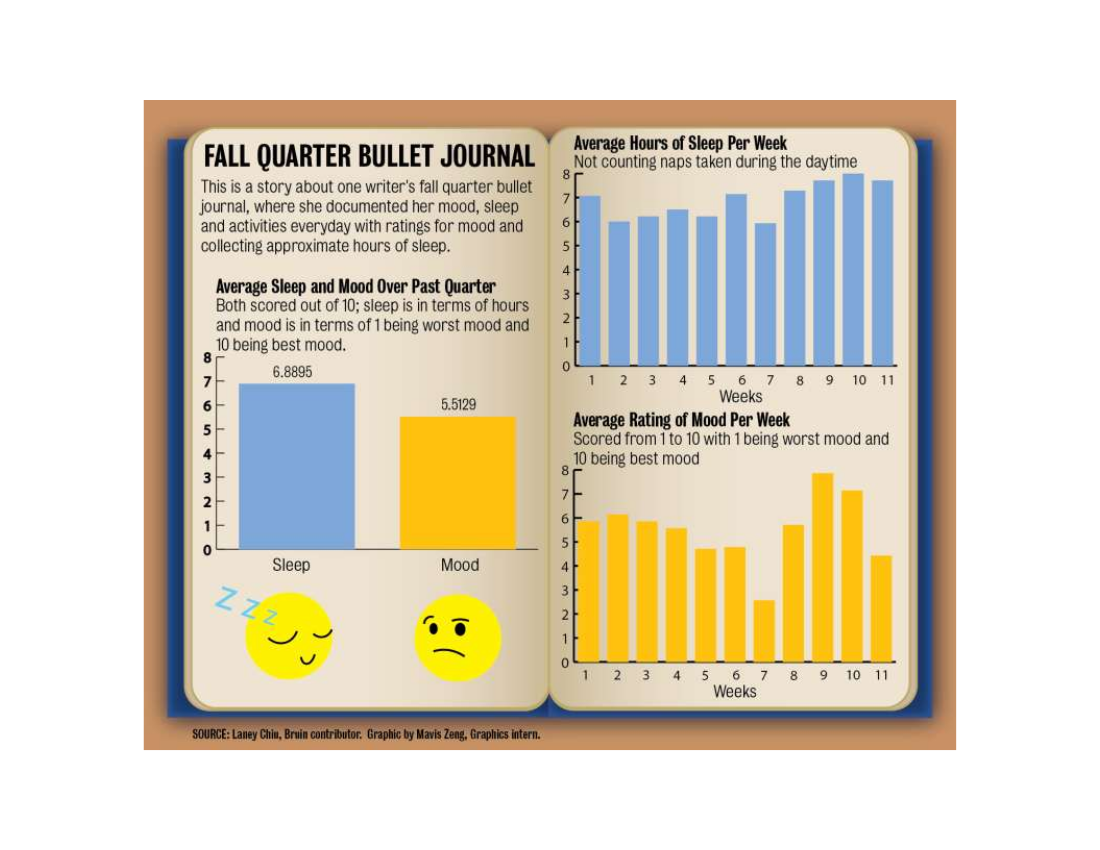
Fall Quarter Bullet Journal Example
Understanding Bullet Journals and Bullet Journaling
Bullet journals are actually invented by Ryder Carrol, a designer based in New York, who packed various elements that makes up of what we know now as a very efficient planner system that allows you to plan for your future, to track and recall your past, and to keep you sane in the present. According to Carrol, bullet journals can “help you track the past, organize the present, and plan for the future.”
Unlike the typical journals in which you can write down what happened in your day, with a bullet journal, you can do so much more. Aside from being able to record your day’s important and memorable moments, you can also make use of a bullet journal to set your goals and list down the things you should do on a daily, weekly, monthly, and even yearly basis.
In a nutshell, a bullet journal is generally good for:
- Those people who have a lot of things to do and could not anymore seem to remember it all
- Those people who prefer pen and paper to-do lists
- Those people who are like to have their goals at their sight
- Those people who like to keep track of their habits
- Those people who love stationery, scrapbooking, colorful pens, and journaling.
- Those people who are more inefficient with the use of planners
- Those people who like to keep things organized
- Those people who like to keep a typical journal or a diary but have a difficulty in maintaining one.
However, keep in mind that none of the aforementioned things above are considered as reasons for liking bullet journals and bullet journaling, but the those who fall under it will definitely be interested in this kind of journaling.
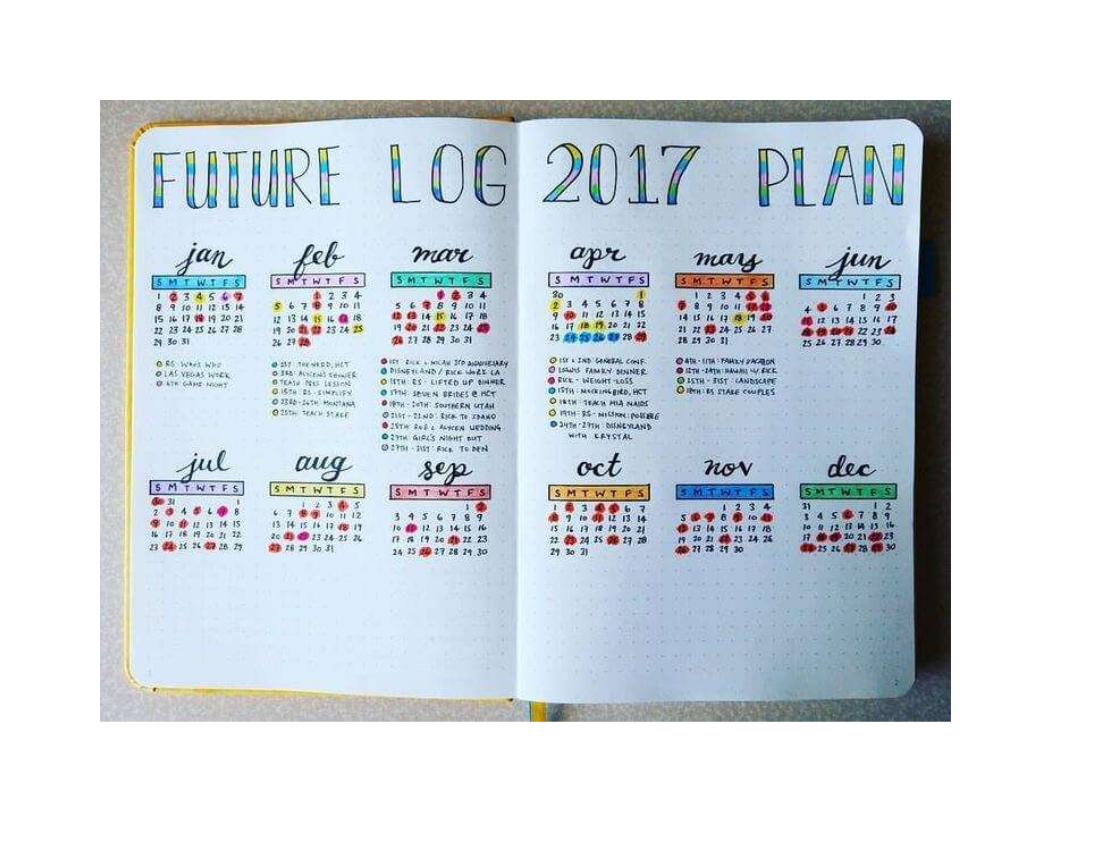
Future Log Bullet Journal Example
Habit Tracker Bullet Journal Example
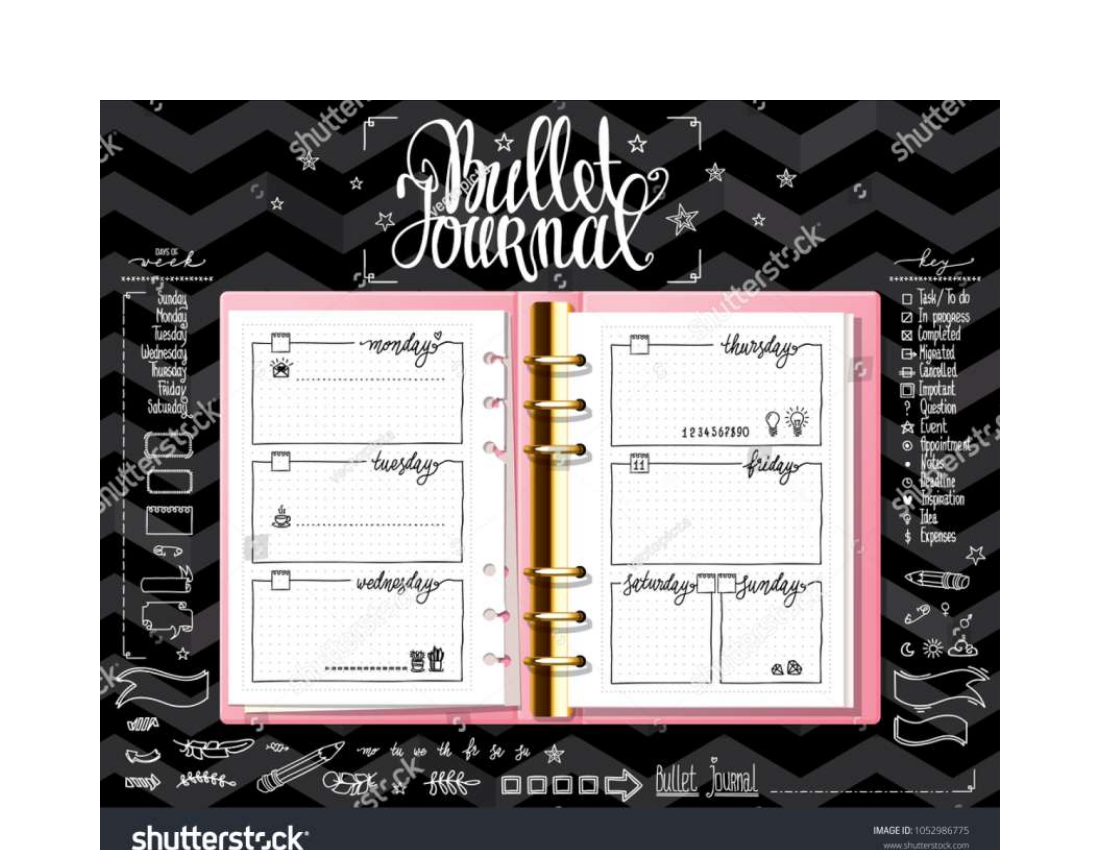
Template Bullet Journal Example
Steps to Get Started with Bullet Journal
At a glance, bullet journaling may be challenging, but once you would get a hang of the steps on how to keep up with it, you will surely consistently fill it up:
Step 1: Adjust your mindset toward bullet journaling
You may have noticed across the Internet of bullet journals that look too fancy and complicated with all the details it contains. Change your mind-set toward this and do not put too much pressure on yourself if you are just starting out with bullet journaling.
Know that it will take time for you in finding out a bullet journaling flow as well as bullet journal structure that will work best for you. Don’t dive in straight and head first toward getting your bullet journaling optimized because that is just too unrealistic and pressure.
Aiming for perfection will not do you any good. Bullet journaling can be considered a creative endeavor and know that any creative endeavor means that you would also have to let go of perfection.
Step 2: Get the right journal and writing tools
Do not choose a fancy and expensive journal. If this is your first time to have a bullet journal, it would be much better if you start with an inexpensive notebook that, in the event when you would commit erasures and mistakes or if it does not simply workout, you would not feel too bad about it and that it wouldn’t be too disheartening to leave that notebook for good.
Contrary to what you would always see on the Internet, it is definitely all right if you would choose a cheap notebook if you are only starting. Just make sure that the notebook would contain blank pages or at least lined instead of those notebooks with ready-made sections.
As for your writing tools, it is definitely all right if you would start with something as ordinary as a pencil and a black pen since it’s your first time and you might probably commit a lot of mistakes.
Step 3: Start off with an index page
Having an index page when starting off is like having a backbone, which would serve as the table of contents of your bullet journal. This is where you would refer to finding particular sections, parts, or pages of your bullet journal.
This is also one way of making sure that you have a general area where you will be able to place all of the necessary guidelines or legends of the signifiers to make your bullet journaling easier to follow through.
Step 4: Create logs
Logs are very important to the bullet journal writing system—it’s like a staple that bullet journals could not exist without.
Logs are the place where you will be able to put all of your tasks, ongoing projects, and even all of your short-term or long-term goals.
Logs in the bullet journal writing system have three types:
- Future Logs
A future log can help you in keeping track of all of the items that are not yet immediate. It could serve as your someday or maybe list that you may or may not be doing some time in the present and any time in the future. - Monthly Logs
A monthly log could include things such as calendars and your goal lists that are categorized for the month. You could even customize each day of the calendar wherein you would have to indicate what goal you will be trying to achieve on that day. - Daily Logs
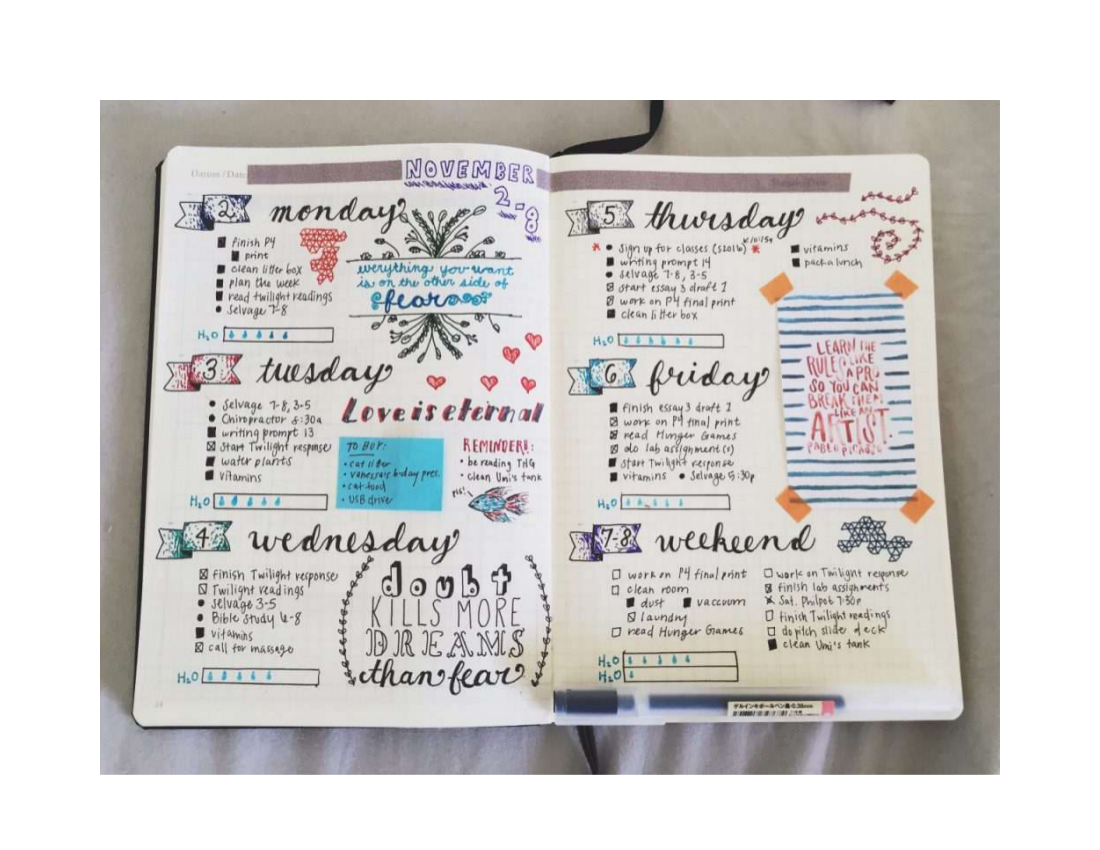
A daily log could include your schedule, reminders, things-to-do, and even your daily goals. You could also include checklists, an inspirational quote of the day, and even a blank space where you would be writing all of the musings you have for that day.
Even if most of the bullet journal you find on the Internet look complicated, simplicity will always be a top tenet of the bullet journal writing system. This is why you should not be worried if you will keep your bullet journal simple and void of all that colorful knick-knacks—just keep your entries brief. Do not arrive at a point where you will not be able to understand your bullet journal or that instead of helping you organize some aspects of your life, your complicated bullet journal would already be causing chaos.
Weekly Bullet Journal Example
Weekly Schedule Bullet Journal Example
Step 5: Pick Signifiers
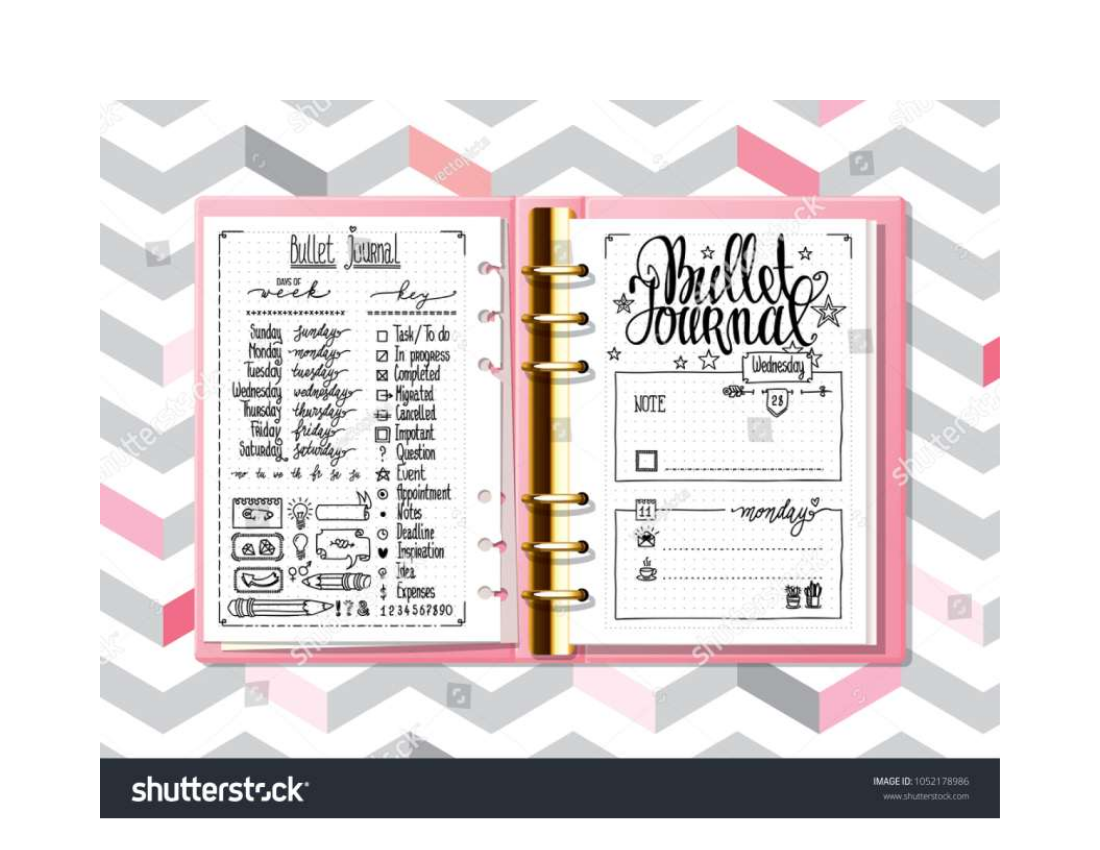
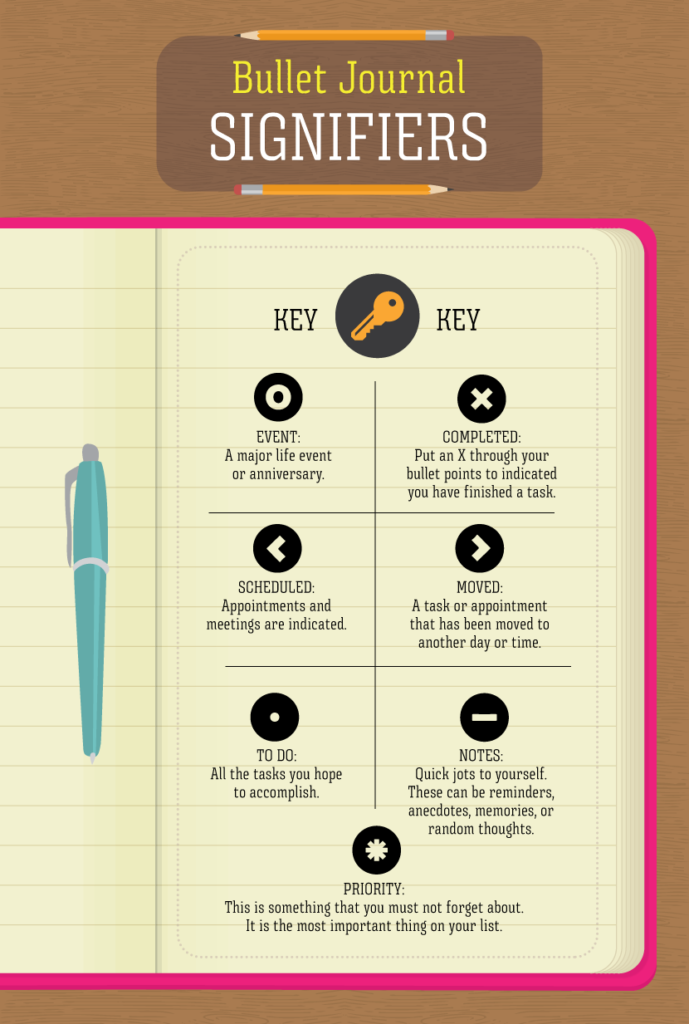
Have you noticed little symbols on the bullet journals you have seen online? Those are called signifiers and these are the symbols you use when it comes to denoting the things or the categories in your bullet journal. Do not be afraid to start simple and just use simple and basic symbols such as basic shapes and simple arrows. Just make sure that you would customize your signifiers in a way that you want it and also easy for you to follow all throughout your bullet journal.
Avoid complicating things and do not be too hard on yourself; you will soon arrive at a point where you will be able to generate signifiers that are more than basic but are comfortable and easy for you to use.
Here are examples of basic and simple signifiers you can follow through:
Step 6: Document with Collections
A collection is a running list of the things that you need to have a document to help you remember for later. Your collections may include:
- The list of books you want to read later on
- The list of movies you want to watch in the next movie night
- The people you have to catch up to
- The list of things that you should be thankful for
- The list of things you want to do before or during your birthday
- The list of self-care ideas
- Own a blog? You may include a list of blog topics.
- Do you want to become a published novelist? You may include story premise ideas.
- Are you an aspiring screenwriter? You may include possible story line ideas.
And there are a lot of other collection ideas that you could include on your bullet journal—just make sure that those are the collection you do want to remember and want so that you would not have any difficulty in filling it up.
Step 7: Make Time for It
Having set a schedule for your bullet journal is one way of being consistent with your bullet journal writing. Bullet journaling is a productivity method that would only be useful if you would actually put it into action. Make time to fill up or update your bullet journal at the start of your day with things that you want to do within the day, for the next 30 days, or for some time in the future. You should also make time after your day ends to cross off the things that you have already accomplished within the day.
You may also make time where you would be conducting a monthly or quarterly review where you would reflect on what you have accomplished so far, transfer some unaccomplished tasks or goals sometime soon, or just list down your latest undertakings.
If you would not even follow the goals you set for yourself and do the tasks you are ought to do at a particular time, then even if you have the most creative and organized bullet journal, it would still be pointless. Make your bullet journal your partner when you would be doing all your tasks and reaching all of your goals instead of giving it the task to lead you.
Thorough Guide to Bullet Journal for Beginners
In its most uncomplicated sense, a bullet journal is a composition that aims to simplify your personal task and plan organization with the use of bullets. These identifiers are small symbols such as a solid circle, hyphen, or tiny diamond shapes which are written before an item in a list. Bullet journals or also known as “BuJo” is an aggregate of almost all of your task-organizing writings like planner, diary, and calendar. Furthermore, the time frame covered by this journal extends from daily to yearlong tasks.
Though there are already existing notes and todo-list apps available on the internet, some still prefer to make their BuJo the pen and paper way. If you are fascinated with this conventional method of bullet journal writing and want to generate a fantastic record of your own right now, remain composed. In this segment, we are going to teach you how to make a simple bullet journal, especially for newbies.
1. Gather all the necessary materials.
Show your resourcefulness and creativity right away in this initial step. To save time and effort, notebooks or compiled pieces of paper are among the best options you have. You may also buy a new one, but to be eco-friendly, recycling old notebooks is highly advised. On the other hand, you may also utilize sheets of construction papers and bind them to create a book-like object. Nevertheless, the options of the canvas where your pieces of information will be placed are limitless.
Once you already selected the sheets where you will write the details needed, gather all your coloring, art, and writing materials. These may include basic ball pens, markers, sign pens, calligraphy pens, highlighters, and many more. Just like the canvas, you also have the freedom to choose for you to express your creativity.
2. Write the index.
Assuming that your journal base is already set, go to the first two spreads. At the top portion of each leaf, indicate it with the heading “Index.” This segment of your bullet journal serves as the table of contents; hence, it would be practical to present it in the first part of the composition. It contains pieces of information regarding the other sections such as page numbers and segment titles. With this, you will have faster and easier access to the rest of your BuJo.
3. Compose your future log.
The next section you need to write is the future log. The future log will serve as your guide for each activity you plan to do within the year. Moreover, you can also include birthdays, major and special holidays, and travel plans in this portion.
After the first two spreads (index) of your journal, provide enough space that would enable you to input details which are good for a year. If you are a pure beginner who uses a notebook of a standard size, provide a four-page spread. Divide each page into three equal parts by drawing a line. You may utilize a ruler to do this step accurately and neatly. Once you have separated the pages, expectedly, you’ll have 12 blank splits that are intended for each month of the year. Correspondingly, title each space with the intended months. Do not forget to write a heading “Future Log,” at the top portions of each respective page you utilized for the future log. Indicate the pages used in your future log on the index.
4. Write your monthly log.
In this section, provide a two-page spread for this month. On the left leaf, indicate the heading and the respective month. For instance, if it is August, you may specify at the top of the page, “Month Log for August.” Aligned on the left side of your page, write all dates of the month vertically. Besides these dates, indicate the day.
On the right leaf, construct a list of your planned activities for the whole month. Remember, in listing all your items, use bullets. Classify these items and use a specific bullet for each kind. For example, you may use solid circles for regular activities, hollow circle for crucial tasks, stars for birthdays, diamond for special holidays, and so on. Also, indicate the specific dates for each business. Also, indicate the pages used in your month log on the index.
5. Create your daily log.
Your daily log solely refers to your day-to-day to-do list. In composing this portion, start with the date and the day as your heading. Under your heading, insert all of your entrees such as tasks, notes, events, etc. using specific bullets. For instance, you may use an asterisk (*) to define major tasks, a hyphen (-) for notes, a hollow circle (?) for events, and many more. This matter is based on your preference and comfortability. Just make sure to get acquainted and remember the designated characters you assigned for each class. Also, do not forget to insert the page of your daily log on your index as well.
How to Use Your Bullet Journal?
Basically, a bullet journal is composed of 4 major parts, namely: the index, the future log, the monthly log, and the daily log. These systematic components are made to organize your activities throughout the year. Thus, these elements work with each other to provide you with a thorough guide on your schedule. Now that you already know how to write your own BuJo, in this section, we are going to teach you how to use it properly. Read through to learn more.
1. Assess the bullets in your daily log.
Let’s assume that you already prepared a monthly log for the next month. Go to your daily log and evaluate the items you inputted on the page. If specific tasks or events are successfully done already, mark an “X” on the bullet of the item. Also, you can do introspection on your open tasks and ponder if the particular plan still needs to be carried out or a particular task still needs to be done. If not, draw a line through the unnecessary items. If an open task still needs to be done within the month, put an arrow pointing right (>) on the bullet. If the particular open task is going to be done months from now, mark the bullet of the item with an arrow point left (<).
2. Write down the right item on the right part.
This step is the time when you need to do the process “migration.” Migration refers to the method of transferring your open tasks, whether on the monthly log or future log. Refer to your daily log. If the open task has a (>) on its bullet, write this item on the monthly log. Note this entry on the respective date on when you need to do the task. If the open task, on the other hand, has (<) on its bullets, write this on the future log on the corresponding month. Also, indicate the date when you need to do it.
By doing this, you can get rid of the unnecessary tasks and be precisely guided regarding the things you still need to do.
3. Do not forget the notes.
Probably, you have important notes listed on your daily log. To organize these, go to a leaf after your monthly log. On the blank page, indicate the main topic of your notes as your heading. Under the corresponding heading, list the specific notes. After you have organized your notes, do not forget to write the topic on the index with its respective page number.
Creating a bullet journal is a task itself. It may appear like it needs a tremendous effort to be done thoroughly. This may be true to you but focus more on the brighter side. The product of your hard work would indeed be fruitful. To get more insights about bullet journals, you may also refer to our goal journal examples, personalized journal examples and other types of journal examples.


