Spherical mirrors are essential in optics, serving as crucial components in focusing light and forming images. On the MCAT, you’ll explore the classifications of mirrors into concave and convex types, the formation of real and virtual images, and the mirror equation. Understanding ray diagrams, magnification, and the principles of reflection is crucial, as these concepts are key to mastering physics and general chemistry sections of the exam.
Learning Objectives
In studying "Spherical Mirrors" for the MCAT, you should learn to distinguish between concave and convex mirrors, focusing on how they reflect light to create images. Understand the differences in image properties—such as size, orientation, and type (real or virtual)—based on the object's distance from the mirror. Analyze the role of focal points and the mirror's curvature in determining image characteristics. Practice constructing and interpreting ray diagrams to predict image formation accurately. Evaluate how spherical mirrors are used in real-world applications, including optical instruments and medical devices, and understand how concepts like spherical aberration affect image clarity.
Distinguishing Between Concave and Convex Mirrors
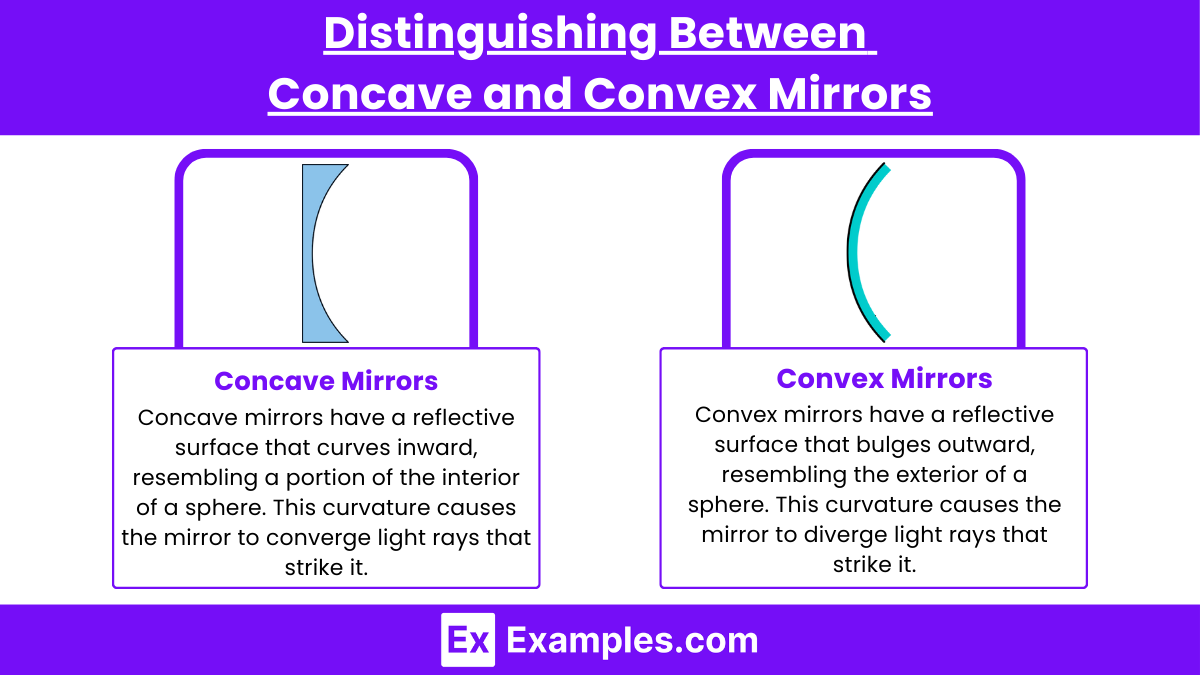
Concave and convex mirrors are two types of curved mirrors that differ significantly in their shapes and the way they reflect light. These differences determine their various applications and functionalities. Here's how to distinguish between the two, based on their physical properties and reflective behaviors:
Shape
Concave Mirrors
Curvature: Concave mirrors have a reflective surface that curves inward, like the inside of a bowl.
Description: They are also called converging mirrors because they tend to converge light rays that strike their surface parallel to the principal axis (an imaginary line perpendicular to the center of the mirror).
Convex Mirrors
Curvature: Convex mirrors have a reflective surface that bulges outward, similar to the back of a spoon.
Description: They are known as diverging mirrors because they cause light rays that fall on them to spread out or diverge.
Reflection Properties
Concave Mirrors
Focus: Concave mirrors can focus parallel incoming light rays to a single point known as the focal point, which lies in front of the mirror along the principal axis.
Image Formation: Depending on the object's distance from the mirror:
Beyond the focal point: Produces real, inverted, and can be smaller or larger than the object.
At the focal point: No image is formed as reflected rays are parallel.
Between the focal point and the mirror: Produces virtual, upright, and magnified images.
Convex Mirrors
Focus: Light rays reflected from a convex mirror appear to be coming from a focal point, but this point is virtual and located behind the mirror.
Image Formation: Always forms virtual, upright, and smaller images regardless of the object’s distance from the mirror. This consistent behavior makes them ideal for certain applications.
Constructing and Interpreting Ray Diagrams
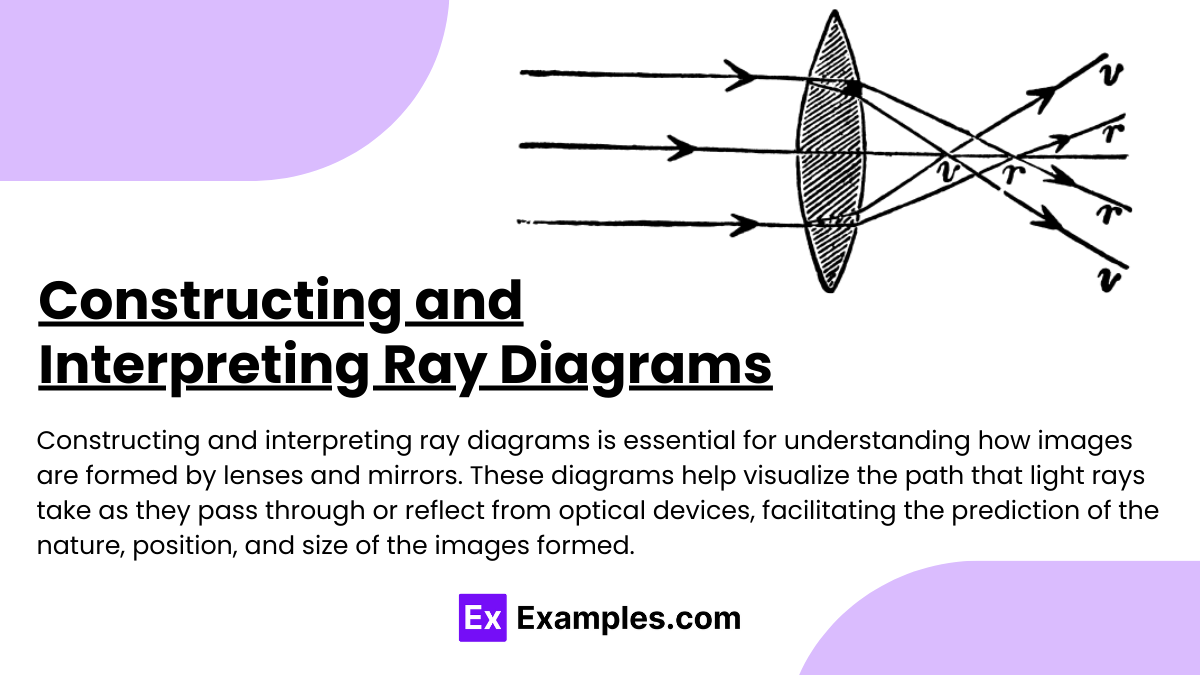
Constructing and interpreting ray diagrams is essential for understanding how images are formed by lenses and mirrors. These diagrams help visualize the path that light rays take as they pass through or reflect from optical devices, facilitating the prediction of the nature, position, and size of the images formed. Here’s a guide on how to construct and interpret these diagrams for both lenses and mirrors.
Constructing Ray Diagrams
For Lenses
Draw the Principal Axis: Start by drawing a straight horizontal line. This line represents the principal axis of the lens.
Position the Lens: Draw the lens at the center of the principal axis. Indicate whether it is a convex (converging) or concave (diverging) lens.
Mark the Focal Points: Place focal points on both sides of the lens. For a convex lens, the focal points are real and located at a distance equal to the focal length from the lens. For a concave lens, the focal points are virtual and also located at the focal length from the lens.
Position the Object: Place the object (usually represented as an arrow) upright on one side of the lens along the principal axis.
Draw Principal Rays: Use at least two of the following rays to determine how the image is formed:
Ray parallel to the principal axis: After passing through the lens, this ray will pass through the focal point on the opposite side (convex) or appear to come from the focal point (concave).
Ray through the optical center: This ray will pass straight through the lens without deviating.
Ray through the focal point: Before reaching the lens, this ray is directed toward the focal point. After passing through the lens, it travels parallel to the principal axis (convex), or it appears to have come parallel (concave).
Locate the Image: The point where the rays intersect (real rays for convex, extrapolated backward for concave) indicates the location of the image. Draw the image as an arrow starting from the principal axis.
For Mirrors
Draw the Principal Axis: Like with lenses, start with a horizontal line representing the principal axis.
Position the Mirror: Draw the mirror along the principal axis. Indicate whether it is concave or convex.
Mark the Focal Point and Center of Curvature: The focal point is halfway between the mirror's surface and the center of curvature (the center of the imaginary sphere of which the mirror is a part).
Position the Object: Place the object along the principal axis on one side of the mirror.
Draw Principal Rays: For mirrors, consider rays like:
Ray parallel to the principal axis: After reflecting, it passes through the focal point (concave) or appears to come from it (convex).
Ray through the focal point: This ray reflects parallel to the principal axis (concave) or directed as if it's coming parallel (convex).
Ray to the vertex: This ray reflects symmetrically about the principal axis.
Locate the Image: Determine where the rays converge (concave) or appear to diverge from (convex) and draw the image accordingly.
Interpreting Ray Diagrams
Image Characteristics:
Position: Above or below the principal axis, on the same side as the object (virtual) or opposite side (real).
Orientation: Upright (positive height) or inverted (negative height).
Size: Larger, smaller, or the same size as the object, depending on the object’s distance relative to the focal length.
Spherical Aberration and Its Impact on Image Clarity
Spherical aberration is a type of optical aberration that occurs when light rays passing through a lens or reflecting off a mirror do not converge at a single focal point. This aberration arises due to the spherical shape of the optical surfaces, which causes rays at different distances from the optical axis to focus at different points. Spherical aberration can significantly impact the clarity and quality of an image, leading to blurring and a loss of detail, especially at the edges.
Causes of Spherical Aberration
Spherical Optical Surfaces: In an ideal optical system, all light rays that enter the system parallel to its optical axis would converge at a single point on the axis. However, in lenses and mirrors with spherical surfaces, rays that strike the surface closer to its edge are bent or reflected more than those that strike near the center. This difference in bending causes the rays to focus at different points along the optical axis, leading to a blurred image.
Lens Aperture: The larger the aperture of a lens, the more pronounced the spherical aberration, as a greater portion of the outer lens or mirror surface contributes to the focusing of light. This is why reducing the aperture size (increasing the f-number) in photographic lenses can help mitigate the effects of spherical aberration.
Impact on Image Clarity
Blurring: The primary impact of spherical aberration is a reduction in image sharpness and clarity, particularly noticeable when strong focusing is required, such as in telescopes or microscopes.
Reduced Contrast: As the light rays do not meet at a single focal point, the contrast of the image decreases, especially affecting the visibility of fine details.
Halos Around Points of Light: In severe cases, spherical aberration can cause bright points of light to appear with halos around them, a phenomenon often undesirable in optics-dependent fields like astronomy.
Correction of Spherical Aberration
Aspheric Lenses: One common method to reduce spherical aberration is to use aspheric lenses, which are not perfectly spherical. The curvature of these lenses changes with the distance from the optical axis, specifically designed to correct the path of the outer rays to bring them into line with the axis.
Lens Combinations: Using combinations of lenses with different curvatures can also compensate for spherical aberration. For example, a positive (convex) lens can be paired with a negative (concave) lens to correct the aberrations introduced by each.
Aperture Adjustment: Reducing the aperture size of an optical system decreases the impact of the outer parts of the lens, thereby minimizing the spherical aberration. This is a simple but effective way to improve image quality, though it can reduce the overall amount of light captured.
Advanced Coatings and Optical Design: Modern optical systems, including high-quality cameras and telescopes, often employ advanced materials and coatings that help focus light more accurately. Optical design software can also simulate and help design systems that minimize aberrations.
Mirror Shapes: In telescopes, using parabolic or hyperbolic mirrors instead of spherical ones can eliminate spherical aberration because these shapes focus all parallel incoming rays to a single point.
Real-World Applications of Spherical Mirrors
Concave Mirrors (Converging Mirrors)
Optical Instruments:
Telescopes: Concave mirrors are pivotal in reflecting telescopes, such as the Newtonian telescope, where they are used to collect and focus light from distant celestial objects, creating clear and magnified images.
Microscopes: Some optical microscopes use concave mirrors to focus light onto the specimen being examined, enhancing the illumination for clearer viewing.
Headlights and Lighthouses:
Automotive Headlights: Concave mirrors are employed to focus light into a beam that illuminates the road ahead without spreading light in unnecessary directions.
Lighthouses: Similar to headlights, the mirrors focus and direct light into powerful beams that travel long distances over the sea to guide ships.
Solar Furnaces and Cookers: Concave mirrors are used to concentrate sunlight onto a small area to generate high temperatures, which is used in solar cookers for heating food and in solar furnaces for industrial heating processes.
Medical and Dental Equipment: Devices like the ophthalmoscope, which is used for examining the interior of the eye, utilize concave mirrors to focus light into the eye and to collect light reflected from the eye, allowing for detailed examination.
Astronomical Research: Large-scale astronomical observatories use massive concave mirrors to gather light from distant stars and galaxies, enabling astronomers to study celestial phenomena that are too faint to be seen with the naked eye.
Convex Mirrors (Diverging Mirrors)
Traffic Safety:
Road Mirrors: Installed at blind corners, parking lots, and high-traffic areas to give drivers a panoramic view of their surroundings, helping to prevent accidents.
Vehicle Mirrors: Rear-view mirrors on vehicles are typically convex to provide a wider field of view, allowing drivers to see more of the road behind them.
Security and Surveillance: Used in shops, malls, and other public places to monitor wide areas for security purposes. Their ability to provide a broad view makes them ideal for surveillance.
Architectural and Interior Design: Convex mirrors are often used decoratively in homes and gardens to add a unique element that also visually expands the space.
Industrial Machinery: Machines and vehicles in factories and warehouses often have convex mirrors to allow operators to see around obstructive equipment or tight corners, enhancing operational safety.
Street Photography: Photographers sometimes use convex mirrors found in urban environments to capture creative and expansive angle shots that include themselves or a broader scenery.
Examples
Example 1: Concave Mirrors in Makeup and Shaving Mirrors
Concave mirrors are commonly used in personal grooming mirrors. These mirrors allow individuals to see a magnified and upright image of their face, making it easier to apply makeup or shave. The reflective surface of the concave mirror causes light rays to converge, enhancing detail and clarity for tasks requiring precision.
Example 2: Telescopes
Many telescopes utilize concave mirrors to gather and focus light from distant celestial objects. The large primary mirror collects light and reflects it to a focal point, where a smaller secondary mirror may direct the light to the eyepiece. This design allows astronomers to observe faraway stars, planets, and galaxies with increased clarity and detail, showcasing the importance of spherical mirrors in astronomy.
Example 3: Automobile Headlights
Concave mirrors are also used in the design of automobile headlights. The bulb is positioned at the focal point of the concave mirror, allowing the light emitted to be reflected forward in a parallel beam. This design maximizes the efficiency of the headlights, providing better illumination of the road ahead and improving nighttime driving safety.
Example 4: Security and Safety Mirrors
Convex mirrors are often employed in security and safety applications, such as in parking lots, stores, and at road intersections. The curved surface of the convex mirror allows for a wider field of view, enabling individuals to see more of their surroundings. This characteristic helps enhance security and prevent accidents by allowing better visibility of approaching vehicles and pedestrians.
Example 5: Laser Systems
Spherical mirrors are used in various laser systems to direct and focus light. In many laser setups, concave mirrors are employed to reflect and concentrate the light beam into a narrow, powerful output. This application is crucial in medical and industrial lasers, where precision and intensity are necessary for effective operation, demonstrating the versatility of spherical mirrors in advanced technology.
Practice Questions
Question 1
What type of image is formed by a concave mirror when the object is located beyond the center of curvature?
A) Virtual and upright
B) Real and inverted
C) Real and upright
D) Virtual and inverted
Correct Answer: B) Real and inverted.
Explanation: When an object is placed beyond the center of curvature of a concave mirror, the mirror produces a real image. This image is inverted and located between the center of curvature and the focal point. A real image is formed on the same side as the object and can be projected onto a screen, which differentiates it from a virtual image, typically formed when the object is within the focal length.
Question 2
Which of the following statements is true regarding convex mirrors?
A) They produce only real images.
B) They always produce virtual images.
C) They can produce both real and virtual images.
D) They do not reflect light.
Correct Answer: B) They always produce virtual images.
Explanation: Convex mirrors are designed to diverge light rays, causing them to appear to originate from a virtual focal point behind the mirror. As a result, any object placed in front of a convex mirror will create a virtual image that is upright and smaller than the object. This image cannot be projected onto a screen because it appears to be located behind the mirror, which is a defining characteristic of virtual images.
Question 3
What is the primary use of spherical mirrors in everyday applications?
A) To generate heat
B) To focus light in optical instruments
C) To create sound
D) To measure distance
Correct Answer: B) To focus light in optical instruments.
Explanation: Spherical mirrors, both concave and convex, are widely used in optical instruments to manipulate light. Concave mirrors are used in applications such as telescopes and headlights to focus light and create clear images. Convex mirrors are often used for safety in car side mirrors and security mirrors because they provide a wider field of view. Thus, the primary use of these mirrors lies in their ability to focus or disperse light in various applications. Options A, C, and D do not accurately reflect the primary purpose of spherical mirrors.

